Valid for Modbus 2 library version 2.6.006, and only for Modbus TCP Master application.
We assume that you have correctly installed NG-Trace and the FBox library according to the instructions on the NG-Trace Download page.
You have already created your Modbus application and therefore, you have an Fupla file with the Master Link IP FBox placed.
- Open the Fupla file with the Modbus Master Link IP FBox. Before this FBox, place an FBox 'Trace Buffer' from the NG-Trace family. Give him the name 'Modbus'.
On the FBox enter a free register (one single free register).
.jpg) The Level option in the NG-Trace Buffer FBox can be found at the end of this page (do not select a too high level if don’t want the buffer to be quickly filled with unnecessary messages).
The Level option in the NG-Trace Buffer FBox can be found at the end of this page (do not select a too high level if don’t want the buffer to be quickly filled with unnecessary messages). - In the Device folder (CPU for PG5 1.4), create a new file with the type NG-Trace.
Important: Uncheck the option 'Linked/Build'.
The NG-Trace will open.
When prompted, select 'Connect to standard buffer'. - Go in the Settings tab and enter the same start register as chosen above. Save the settings.
- Build, load and run your program as usual in the PG5 Project Manager. During build, you should get these 2 messages:
- NG-Trace Buffer for Modbus created.
- NG-Trace Buffer for Modbus 2 Driver found
Only if you get these 2 messages, the trace buffer will work. - Go online with the PG5 Project Manager.
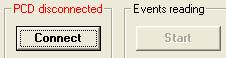
- In the View tab of the NG-Trace, press the Connect and the Start buttons.
 The named columns appear and the events are recorded. If the options are checked, the PC Date, PC Time and PCD status are added.
.jpg)
Read the Help file for more explanation about the use of NG-Trace.
Signification of the levels which can be configured in the FBox 'NG-Trace Buffer'
| Message | Level 1 | Level 2 | Level 6 | Level 8 |
| Version | X | X | X | X |
| Internal Info | X | X | X | X |
| Timeout Errors | X | X | X | X |
| TCP Open/Close | X | X | X | |
| TCP Connections | X | X | X | |
| Tx/Rx Requests | X | |||
| Rejected requests | X | X |